
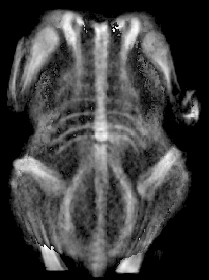
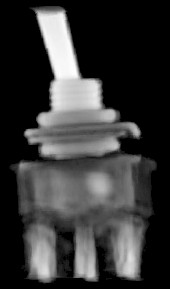
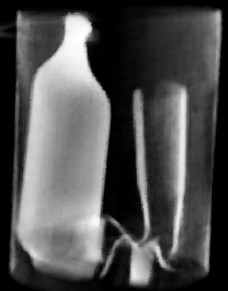
Since college course "Analysis of Signals and Images" I've been interested into backprojection. That is algorithm for reconstruction of 2D sample slice from set of its 1D projections (for example from x-ray projections taken from several angles). It worked quite well for single slice case but I was curious if the method can be extended for direct reconstruction of 3D volume model from 2D projections (later I've find out this case is called cone-beam backprojection). Recently I found some 3D x-ray videos on youtube and these seemed to me like ideal data source for following experiment.
|
|
|
I started writting my reconstruction program in Matlab but it was "a bit" slow so I switched to C/C++. After successful implementation of both ray and voxel driven cone-beam backprojection algorithms I decided to implement my own raycaster for 3D volume viewing because use of 3D Slicer is often quite annoying. 3D Slicer is powerfull tool but it has certain bugs and also my video card is not supported (it's a bit too slow in CPU mode).
Backprojection is very simple method. It's basically summing of 1D projections taken from different angles into resulting 2D image (slice). To make the result sharp, it's necessary to prefilter the projections with kind of highpass filter (that is why it is called filtered backprojection). Filter also eliminates bias (mean intensity of the projection). Graphical demonstration of this basic case for parallel beams is shown on fig. 1.1, some more details in [2].
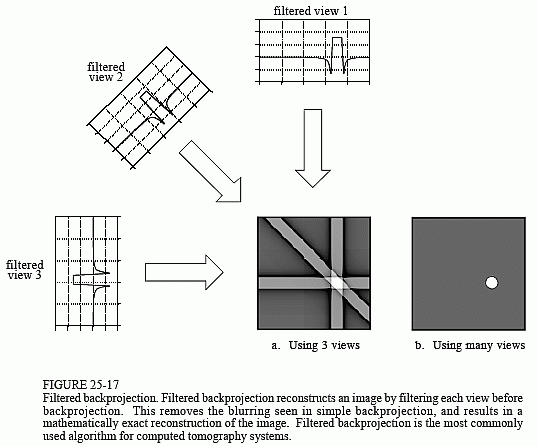 Fig. 1.1 - Basic parallel beam filtered backprojection principle [2].
|
If 3D model is required then it's necessary to repeat the process for different axial positions of the sample in the scanning gantry.
Then the particular slices are combined into 3D volume that can be viewed in volume raycasting software like for instance 3D Slicer.
This way of 3D model gaining is however not the only one.
It is possible to extend the principle for direct reconstruction of 3D volume from 2D projections without axial movement of scanned sample.
This method is called cone-beam backprojection. The process of scanning is shown at fig. 1.2.
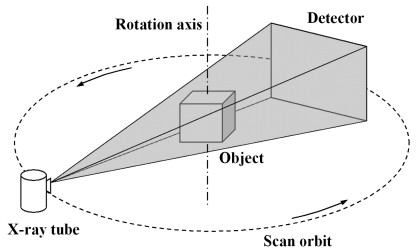 Fig. 1.2 - Cone-beam backprojection scanning setup [4].
|
The process of reconstruction is similar in this case: Virtual detector and focus point is placed and oriented in 3D space exactly as they were during scanning and
the 2D projection image is then "stretched" (interpolated) to the focal point as shown on fig. 1.2. The fraction of the spire that intersects reconstruction area (cube in this case)
is added to it. The process is then repeated with every available projection.
Practical realization is generally possible by two approaches: Ray driven and voxel driven method.
Ray driven method is basically inverse raycasting: For every pixel of every projection virtual ray is sent to the focal point and its intersecting section with destination voxel
volume buffer (3D array) is added into it. So the process involves only calculation of
ray-box intersections
and rasterization (or "voxelization" since it's 3D) of the ray in voxel volume array.
Advantage of this method is speed and simplicity and it also unintendedly applies ray density weighting which means the volume area closer to
the focal point will have higher average intesity (the rays are closer to each other) then the area closer to the detector.
Big disadvantage is that it's necessary to have projections in higher resolution otherwise some of the voxels might be missed by the rays totally or hit only several times (high noise).
In this case it is necessary to massively upsample the projections and that of course decimates the speed of reconstruction rapidly.
Later method, the voxel driven reconstruction, starts from opposite side of the problem: For every voxel of the voxel volume buffer virtual ray is sent from focal point
through the voxel and intensity of the pixel of current projection that is hit by the ray (if some of them is hit) is added to the voxel. This is repeated for every voxel of the volume with every
projection available. Advantage of the method is that it produces clean result for any resolution of the volume and projection. Disadvantage is that it's necessary to implement weighting by ray
density as mentioned before. Theoretically it can be ignored if the focal point is far away from voxel volume because rays will be almost parallel, then the errors caused by this simplification
should be negligible.
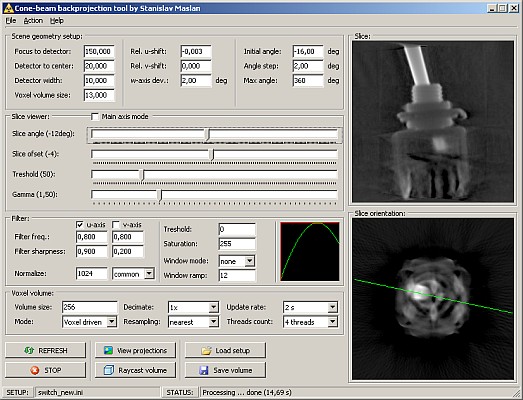
My backprojection tool is able to load set of projection images defined by project INI file, do the filtering, backprojection and volume raycasting. The INI file also defines geometry of the scene, filters, viewer setup and several other things, details are described in following paragraphs.
 |
|
Fig. 2.1 - Cone-beam backprojection tool.
|
The program is made in BDS 2006 Turbo C++ and tested in Windoze XP/7. It has been built as 32-bit multithreaded application
so it should work in both 32 and 64-bit systems.
The reconstruction needs quite a lot of CPU power so it'll have reasonable performance only on modern PC's with multicore CPU and fast memory.
It was designed and tested on Intel i5 3450 (4 cores/4 threads) with 1600MHz DDR3 memory.
Every operation that might take significant amount of time is distributed into several threads.
Threads count is defaultly set according to the machine but can be decreased in the menu.
Download, V1.00, 14.4.2013: cone_beam_backprojection_tool_2013_04_14.zip (2.1 MB).
It's freeware tool so you can use it for any purposes but without any warranty for its proper function.
You are not allowed to redistribute the tool without help files (content of the help folder)!
Author is not responsible for any possible dammages caused by this tool.
If you don't agree with these terms don't use this tool.
If you want to create new setup (new set of projection images), just copy template INI file somewhere (or load the template and save with different name)
and edit [PATH] section. There are only two keys:
path - relative or absolute path to folder with your projection images,
mask - wildcard string to filter out images in the folder, for example "img_????.bmp".
Source images are supported only in BMP, 8-bit indexed or 24-bit RGB format (grayscale only).
Image names has to be choosen so after sorting by name they are ordered as they were scanned.
Projections angle increments has to be equidistant. All images are required to have the same resolution!
Rest of the configuration can be made via the tool itself when the setup (INI file) is loaded.
First thing to configurate for new setup is scene geometry. Figure 2.2 shows meaning of the parameters. Red cube in center represents destination voxel volume.
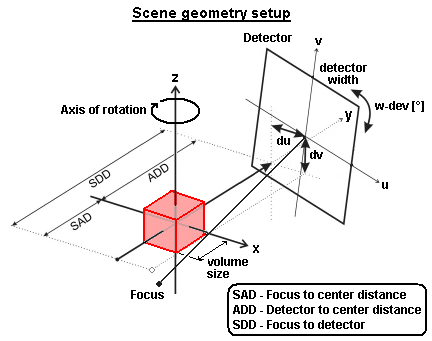 Fig. 2.2 - Scene geometry setup, original image from [3].
|
Detector center offsets du and dv are relative to its dimensions in range ±0.5. Detector height is calculated from width and aspect ratio of projection image. Any changes are applied by Enter key or Refresh button.
In this section you can setup projection images filters. First applied filter is treshold and saturation in range 0 to 255. This helps to eliminate some noise. Then windowing function can be applied to smooth edges of the images. Last filter is main backprojection filter with defined profile. Usually only u-axis filtering is used but you can enable v-axis filtering too. Default settings (cosine filter): f=1.0 and s=1.0. Filtered results are normalized to defined level (usually 1024). If "common" mode is chosen all projections are taken as one image, then normalized and split again. If "individual" mode is chosen projection images are normalized individually. Later option migh be useful for unstable exposition of the projections. Any changes are applied by Enter key. This will process all filtering with new setup and then reconstruction process.
Here you can set voxel volume resolution N in range 64 up to 400. Decimation throws out some projections to speed up reconstruction.
It can be useful for experimental geometry tuning. Mode option switches between ray driven and voxel driven mode. Ray driven mode is usually faster but multisampling is required
for reasonable output quality. Voxel driven mode is intended for final reconstruction. Optionally linear resampling can be enabled. This might be usefull for low resolution
projections.
In this panel you can also specify number of processing threads. Program should detect your CPU threads count and is automatically set to maximum value. In some cases
it might be necessary to decrease threads count because memory limit for 32-bit applications may be exeeded (for high resolutions of voxel volume). You can also specify
how often slice viewer updates while processing.
Reconstructed volume can be exported as set of slice images. To do so just click to Save volume button. The program then asks for destination folder and
file name prefix. For example prefix "img" will generate images img_000.bmp, img_001.bmp, ... Format is 8-bit indexed BMP without any postfiltering. Result can be
easily loaded into 3D Slicer.
Here you set slice orientation in reconstructed volume and its postfilter (treshold and gamma correction). Escape key resets focused slider to its default value. Double click to slice image can be used for image export in BMP format.
Button View Projections enables projection images viewer. You can inspect original and filtered version of the projection images.
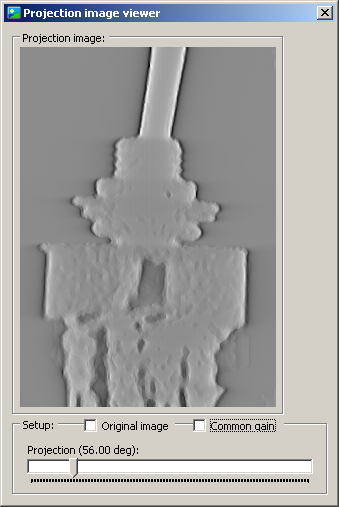 Fig. 2.3 - Projections viewer.
|
To eliminate need of 3D Slicer I've implemented my own volume raycaster. It's ray driven raycaster without interpolation and it implements only basic
methods but it's definitely more effective to use than exporting and loading the volume into 3D Slicer everytime some configuration is changed.
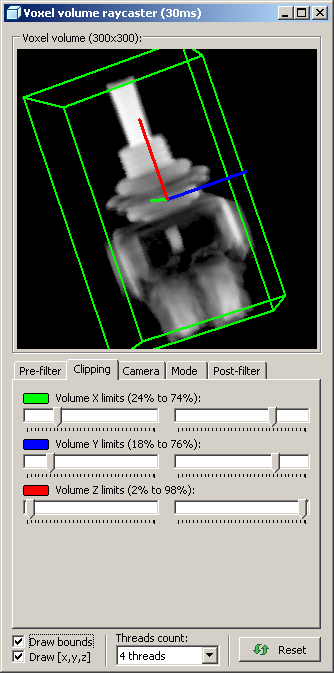
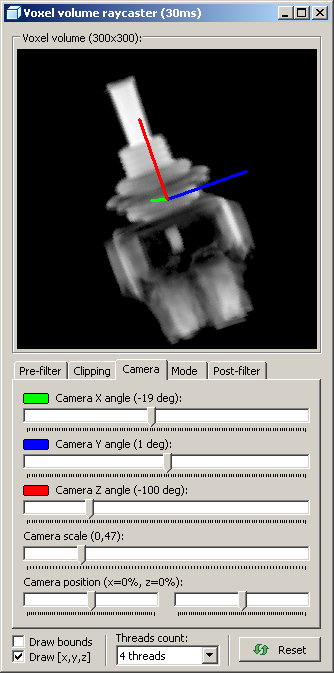
Same as for reconstruction process (which is basically just inverse algorithm) you can set number of processing threads. Optionally bounding box and axis
can be displayed. Reset button reloads original settings from setup INI file. Excape key resets value of any slider to default value.
|
|
|
Fig. 2.4 - Volume raycaster setup.
|
|
There are several tabs with setup and are organized in order as they are used during raycasting process. First thing
to setup is prefilter. Treshold and cutoff limit can be set. Treshold should be set to eliminate reconstruction noise around sample object.
Voxels with value exceeding cutoff limit are replaced with zeros (black).
In Clipping tab you can set bounding box to leave out unused part of the volume. Use Draw bounds check box to display bounding box. Reducing size of the bounding area
may increase performance a bit.
In tab Camera you set viewing angle, offsets and scale. You can do this also with mouse in image area. Drag with right mouse button is used for movement, with left for rotation and with left+ctrl for
multi axis rotation (experimetnal, not debugged yet). Double click resets camera view to default. Right button also displays menu from which you can export current image as 24-bit BMP.
In tab Mode you can select raycasting mode. Basic mode casts all voxels along ray trace so model will be fully transparent (fig. 2.5a).
Alternatively raycast can be start with condition which is, in this case, voxel value treshold. Ray then continuess only up to selected depth.
Result is partially transparent model (fig. 2.5b).
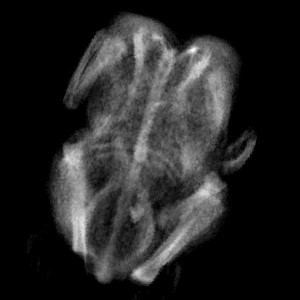 Fig. 2.5a - Full raycast
|
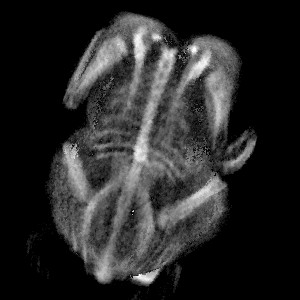 Fig. 2.5b - Limited depth raycast
|
Last tab is used to setup post-filter. You can set gamma correction and saturation level. Fixed check box disables automatic white level control (manual white level). Additionally you can invert image.
Here you can donwload a few exported projection data sets with already cofigured geometry:
 Two pole switch (scanned by Danyk [5]), download: ct_switch.zip (3.9 MB). |
 Fluorescent lamp starter (scanned by Danyk [5]), download: ct_starter.zip (3.2 MB). |
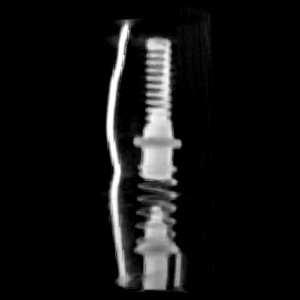 Lighter insides (scanned by Danyk [5]), download: ct_lighter.zip (3.2 MB). |
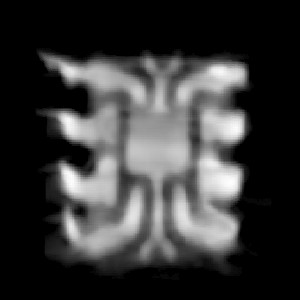 DIL8 package (scanned by Danyk [5]), download: ct_DIL8.zip (819 kB). |
 Clock (scanned by Ruslan [7]), download: ct_clock.zip (10 MB). |
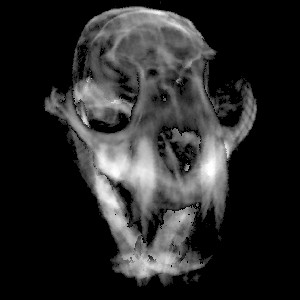 Lynx skull (scanned by Noah Spurrier [9]), download: ct_lynx_skull.zip (5.9 MB). |
 Chicken (scanned by Ben Krasnow [6]), download: ct_chicken.zip (1.3 MB). |
 Unhatched egg (scanned by Oliver), download: ct_eier.zip (5.7 MB). |
I was a bit lazy to draw all images needed for this article so I used some from following sources:
| [1] | TURBELL, Henrik. Cone-Beam Reconstruction Using Filtered Backprojection. Dissertation No. 672, Department of Electrical Engineering Linköpings universitet, SE-581 83 Linköping, Sweden, February 2001. http://people.csail.mit.edu/bkph/courses/papers/Exact_Conebeam/Turbell_Thesis_FBP_2001.pdf |
| [2] | http://www.dspguide.com/ch25/5.htm |
| [3] | http://www.sciencedirect.com/science/article/pii/S1120179711000251 |
| [4] | http://opticalengineering.spiedigitallibrary.org/article.aspx?articleid=1088790 |
As I mentioned I'm using 3D x-ray videos from youtube as source data. There are several authors of these:
| [5] | Danyk: www.danyk.cz, http://www.youtube.com/user/danyk666 |
| [6] | Ben Krasnow: http://benkrasnow.blogspot.cz/, http://www.youtube.com/user/bkraz333 |
| [7] | Ruslan: http://www.youtube.com/user/ruslan55x55 |
| [8] | Josef Bogin: http://www.youtube.com/user/TheReal1inflater |
| [9] | Noah Spurrier: http://www.youtube.com/user/noahspurrier |
Source video example [5]:
| Last update: 25.7.2018 |  |
 |